Organization Settings
Written By Aladia Support
Last updated 11 months ago
This guide provides a detailed overview of managing organization profiles, preferences, notifications, roadmap features, IAM users, payments, and business details. It ensures a smooth user experience and accurate information handling.
Profile Info
Edit the cover image, contact details, bio, industry type, employee count, and location. save changes to update the profile, and verify that updates are displayed correctly. For a detailed guide, please refer to the (Profile Info).
General Preferences
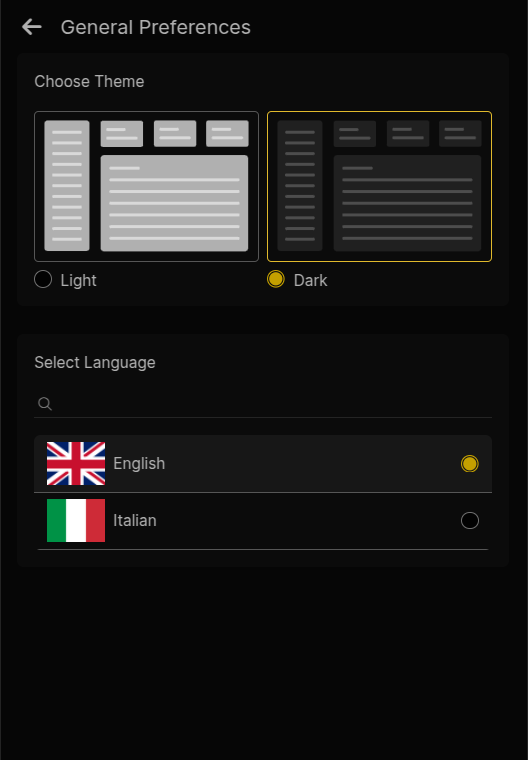
Accessing General Preferences
Navigate to the Settings page by clicking the profile icon in the top-right corner. Locate the General Preferences section under the Account category.
Click General Preferences to access customization options.
Choosing a ThemeLight Theme: A light interface with a white background.
Dark Theme: A dark interface with a black background (currently selected).
NOTE: Currently only the Dark Theme is available.
Selecting a Language
Available languages:
English (default)
Italian
Click the radio button next to the desired language to switch the system language.
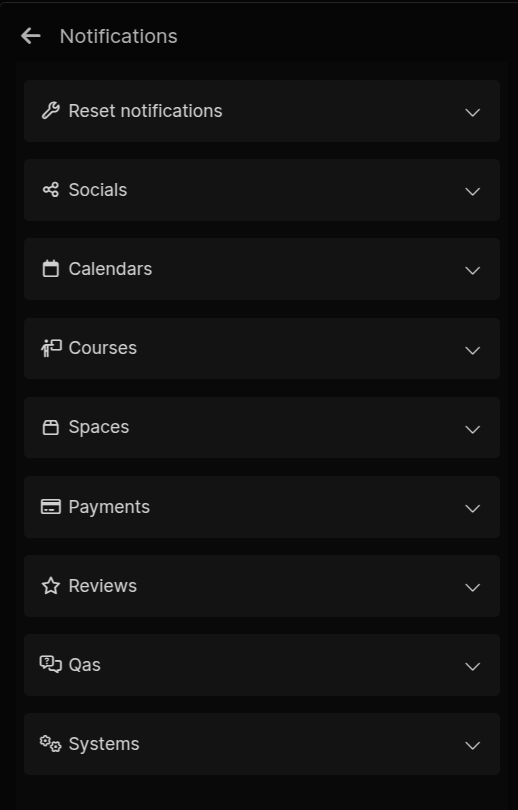
Notifications
Navigate to Notifications
Click the profile picture in the top-right corner of the header bar.
Scroll down and click the Notifications option.
Notification Settings Menu
Opens with expandable/collapsible sections for each notification category. Toggle switches control each notification type.
Reset Notifications
Click Reset Notifications at the top.
A pop-up appears: “This action will reset all notification settings to default values. Are you sure you want to proceed?”
Click Reset to confirm or click outside to cancel.
Notification Categories & Options
Socials:
Connections: New Followers, New Contact
Interactions: Comments & Reactions, Reposts, Mentions in Posts
Event Updates: Created, Deleted, Modified
Event Reminders, Upcoming Event, Missed Event
Invitations to Event/Calendar
Courses:
Updates & Enrollment: New Courses Available, Course Updates, Course Starting Soon
Your Courses: Missed Course, New Course in Marketplace Category, Your Course Tagged, Course Suspended
Spaces:
Invitations & Membership: Invitation to Space, Invitation Accepted/Declined, User Added/Removed
Role Management: Role Changed, User Role Assigned/Changed
Space Management: Space Deleted, Space Edited, Low Storage Space
Payments:
Reports: Monthly Report, Weekly Report, Transactions
Payment Actions: Payment Received, Payment Sent, Payment Successful, Installment Paid
Course Payments: Course Purchased, Subscription Fee Paid
Payment Issues: Payment Failed, Refund Issued, Upcoming Payment, Subscription Renewal
Promotions & Offers: Special Offers
Reviews:
New Review, Review Updated, Comment on Review, Teacher Responded to Review
Q&A:
Answer to Your Question, New Answer, General Q&A Activity
Course & Category Questions: New Question in Course, New Question in Category
Your Questions: Answer Marked as Best, Teacher Answered, All Questions Answered, Question Marked as Solved
Systems:
Account & Profile: Ban, Become a Teacher, Complete/Incomplete Profile, Account Suspended
Platform Updates: System Updates, Storage Status, Streaming Status, Access Changes
API Key Authentication
Generate, manage, and delete API tokens in Aladia by creating keys with a name and expiration period, editing or deleting keys with confirmation, and accessing API documentation for reference. For a detailed guide, please refer to the (Generate and Edit API Token).
Webhook
Configure real-time event notifications by setting up webhooks with a title, endpoint URL, and event categories, then manage, monitor, edit, disable, or delete them in the Hosted Endpoints section. For a detailed guide, please refer to the (Webhook).
FeatureBase
Access the FeatureBase
Click the profile picture in the top-right corner. Select FeatureBase from the settings menu.
External Redirect Confirmation
A modal notifies the user that they are leaving Aladia for FeatureBase.
(aladia.featurebase.app)Options: View feature releases, share feedback or suggestions.
Viewing the Roadmap on FeatureBase
The roadmap is organized by:
Feature Requests
UI/UX Audits
Roadmap Sections: Planned, In Progress, Complete
Providing Feedback
Log into FeatureBase to submit suggestions, upvote, and comment on existing entries.
Video Guide:
About
Add an About section to your organization on Aladia by accessing the Profile Page, navigating to the About section in the Settings Popup, and using the text editor to enter and format content up to 2,000 characters. For a detailed guide, please refer to the About.
Social Links
Add or delete social links in your organization profile by accessing the Settings Panel, navigating to the Social Links section, and using the simple interface to manage your social media accounts. For a detailed guide, please refer to the (Social Links).
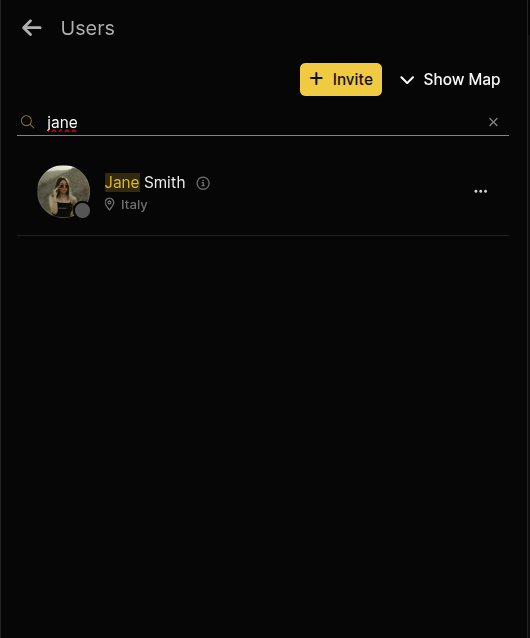
IAM-Users
Access the Settings Panel
Click the profile picture in the header or sidebar. Click the Edit icon on the profile picture.
Navigate to the IAM-User Section
Open the IAM-User section from the settings.
The panel displays:
Invite button
Hidden map section (toggle Show/Hide Map)
Search field for users
List of members with location and join date
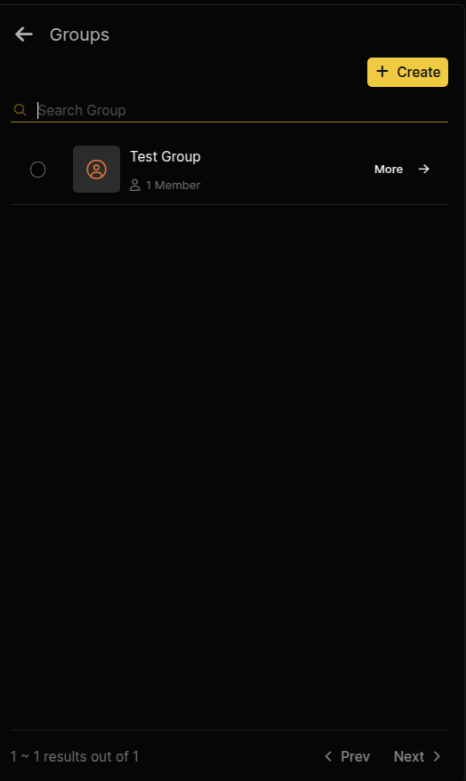
IAM-Groups
Access the Settings Panel
Open the settings panel using one of the following methods. Click on the profile picture in the header.
Or click on the profile picture in the sidebar and click the Edit icon on the Profile Picture.
Navigate to the User Management Section. In the settings panel, locate and open the IAM-Group section.
Clicking IAM-Group opens a panel with a Create button, a hidden location map and a dropdown option to Show Map or Hide Map.
Search field to find Groups.
The list of Groups, including their location and joining date to the organization.
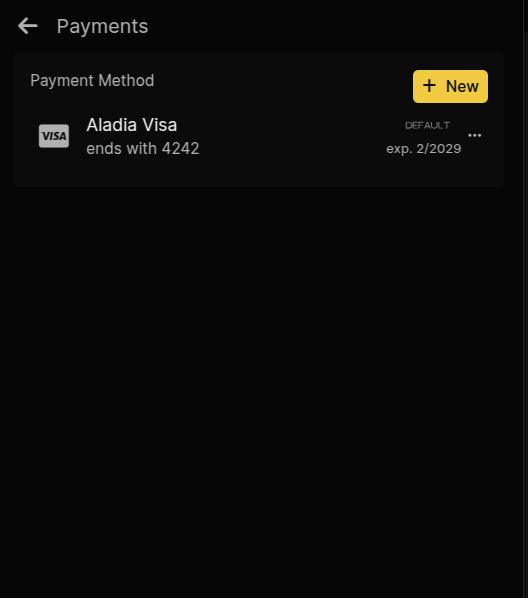
Payments
Access the Payment Settings
Click the profile picture in the top-right corner of the header bar. Scroll down and click on the Payments option.
Viewing Saved Payment Methods
Displays a list of saved payment methods with:
Card type, Last four digits, Expiration date, Default status (if applicable)
Adding a New Payment Method
Click the + New button.
Fill in details:
Card number, Expiration date, Security code (CVV), Cardholder name, Country
Optionally, toggle Set as default payment method.
Click Add New Card to save.
Managing Payment Methods
Set as Default: Click the ellipsis menu next to the card and select Set as Default.
Delete a Payment Method: Click the ellipsis menu beside the card and select Delete.
NOTE: For a detailed guide, please refer to the (Adding and Managing a Payment Method)
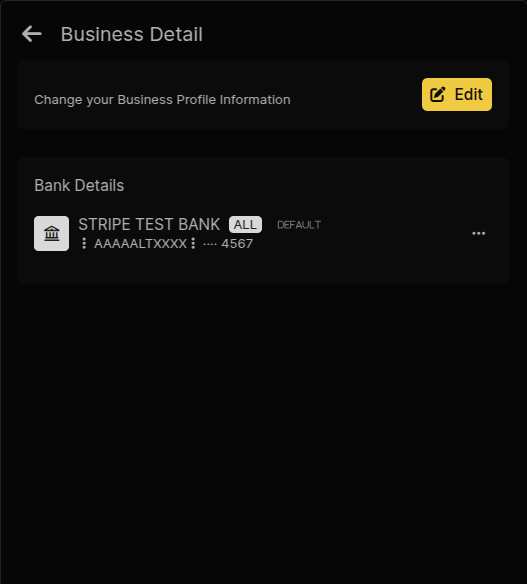
Business Details
Access the Business Details
Click the profile picture in the top-right corner. Scroll down and click on Business Details.
Updating Business Profile Information
Click the Edit button to update:
Personal details: Name, Date of Birth, Address, ID Document
Payout details: Bank account information
Click Confirm to save updates.
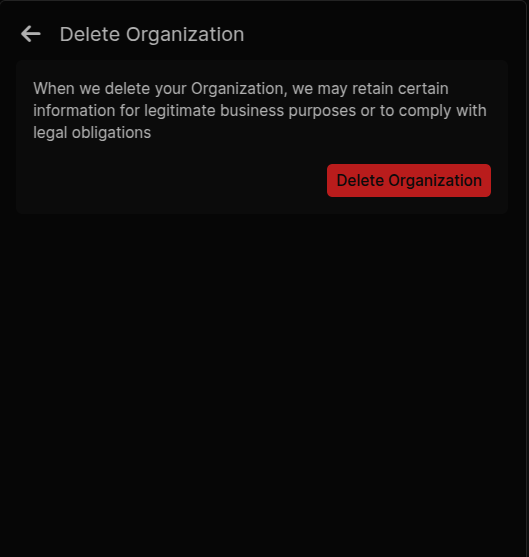
Delete Organization
Initiate the Deletion Process
Go to the organization’s profile page. Click the Settings button and scroll to the Delete Organization section.
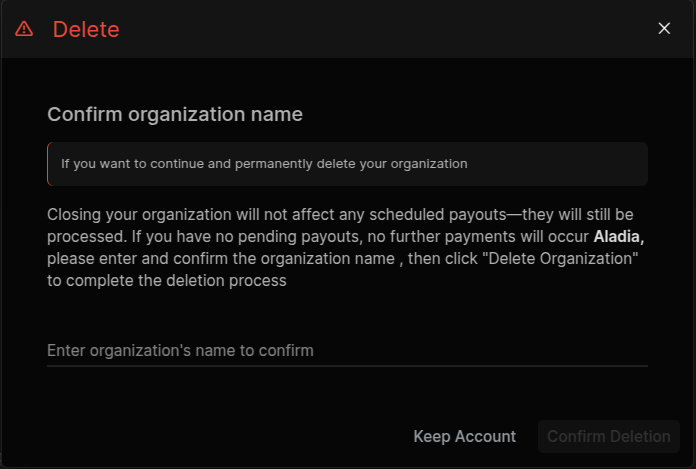
Confirm Deletion
A confirmation pop-up appears.
Enter the exact Organization Name in the input field.
Click Delete Organization to finalize.