Identity and Access Management
Written By Aladia Support
Last updated 11 months ago
This guide helps organizations securely manage access and collaboration through IAM. It covers inviting users, assigning roles, and editing user permissions. You’ll also learn how to create and manage user groups, add or update organizational branches, and connect with external sites. Each section supports efficient team coordination and structured access across multiple locations.
User Invitation Management
Access the IAM User Management section
Switch to the organization by the organization's name from the left sidebar list.
Navigate to your organization or the organization users have access to from the sidebar. On the top navigation bar, click on the IAM tab.
After clicking IAM, a page with a location map will appear. Below the map, a navigation bar with tabs for Users, Groups, Branches, and External will be displayed. Click on the Users tab to view the organization's members.
Invite Users
The Users tab displays a list of current members.
Click on the Invite button in the top-right corner, below the location map. A sidebar popup will appear with various invitation options.
Invite via Link
Click the Invite via Link at the top-right of the sidebar popup. A new popup will appear, allowing users to select a role for the new user.
After selecting the role, click Copy Link to generate and copy the invitation link.
Share the link with the intended user so they can join.
Invite via Search
In the sidebar popup, select a role for the new user from the dropdown menu by clicking the chevron down button.
Click on the search input field and look for the user on the platform. Once the user is found, select them from the list.
Click on the Invite button at the bottom right corner.
Video Guide:
Manage Users
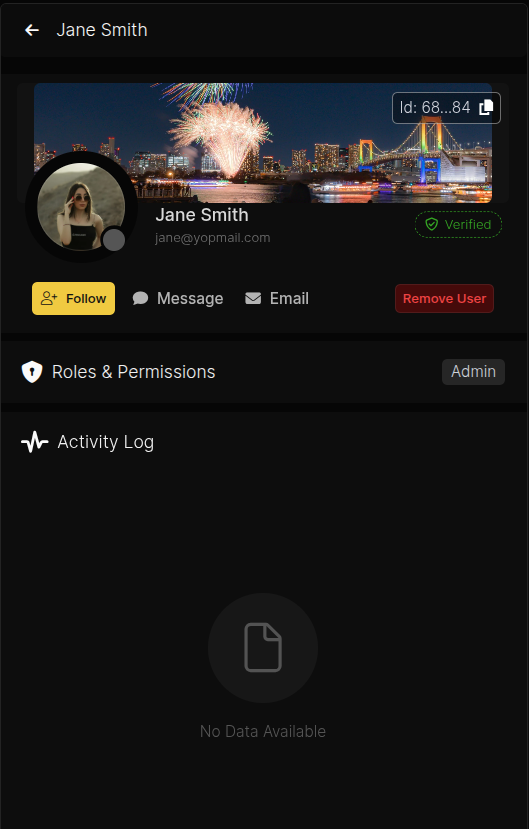
After inviting a user, click on their name from the Users tab list. A sidebar popup will appear, showing the user’s details. From this sidebar, users can:
Modify the user’s role by selecting from the role list.
Remove the user by clicking the Remove User button in the middle right section.
Click on the Follow button to stay updated with the user’s activities.
Click on the Message button to start a conversation with the user.
Groups Management
Access the IAM Groups Management Section
Switch to the organization by selecting it from the left sidebar.
Click the IAM tab in the top navigation bar. A page with a location map will appear.
Below the map, a navigation bar with tabs for Users, Groups, Branches, and External appears.
Click on the Groups tab to view the organization's groups.
Create a Group
Click the Create button in the top-right corner (below the map). A sidebar popup will appear. Click on Add Group Title.
Enter a required group title in the input field.
Choose a color by clicking on the color option to open a color palette.
Add an icon or image:
Click on the icon input to select an icon.
Click on Upload Image to add a custom image.
Click on Save.
You will be redirected back to the sidebar popup.
Add Users
Click on the (+👤) button to add a user to the group
Search for users to add. Click the + Add button.
Manage Group Details
The newly created group will appear in the Groups tab list. Click on the group to view its details.
Edit group details by clicking the Edit icon in the top right corner.
Empty the group by clicking the Empty Group button. Delete the group by clicking the Remove Group button.
The group details page has three tabs: Members, Roles, and Activity Log.
Manage Group Members
Under the Members tab: Remove a specific member by clicking the Remove button next to their name.
Manage Group Roles
Click on the Roles tab and users can:
Update user roles within the group.
Use the person add icon next to the search bar to open another sidebar popup.
Search for a user and click the Invite button to add them to the group.
External Management
Add External
Navigate to the Branches Section
Navigate to your organization by selecting it from the left sidebar. Click on the IAM tab in the top navigation bar.
Upon clicking IAM, a page with a location map will appear. Below the map, find the navigation bar with tabs: Users, Groups, Branches, and External.
Click on the External tab to access the organization's external management.
Add a New Site
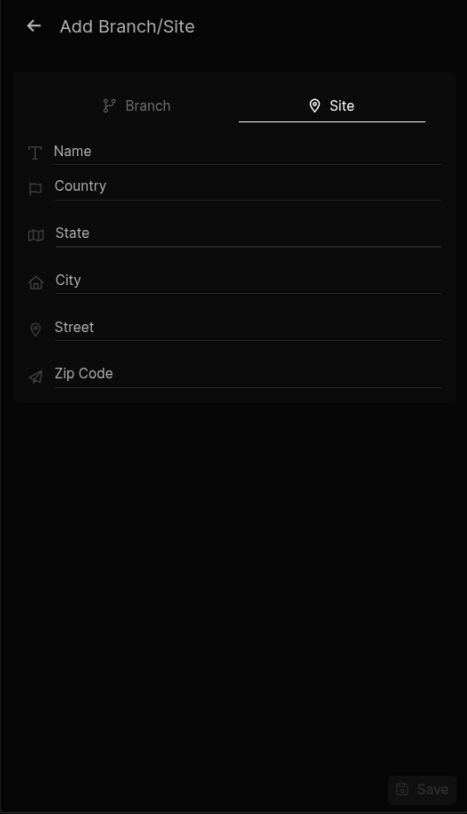
On the Branches page, click the Add button in the top-right corner. A sidebar popup will appear with two options: Branch and Site.
Click the Site tab at the top of the sidebar.
Enter the necessary site information, including:
Name
Country
State
City
Street
Zip Code
Click Save to add the site. Adding a site will create an external location for the organization.
Confirmation
Once the branch or site is successfully added, a confirmation message ("Invite organization successfully") will appear at the top of the screen.
After the organization accepts the invitation, it will be listed in the external list.
Edit External
Select the Branch to Edit
Click on the IAM tab in the top navigation bar.
Locate the Branches section by selecting the Branches tab. Find the branch in the branch list.
Click on the More button next to the branch you want to modify.
Edit Branch Details
A sidebar popup titled Edit Branch will appear. Choose the Site tab at the top.
Modify the necessary fields, such as:
Name
Country
State
City
Street
Zip Code
Save the Changes
After making the required updates, click the Save button in the bottom-right corner.
A confirmation message will appear, indicating that the branch details have been successfully updated.
Branch Management
Add Branch
Navigate to the Branches Section
Navigate to your organization by selecting it from the left sidebar. Click on the IAM tab in the top navigation bar.
Upon clicking IAM, a page with a location map will appear. Below the map, find the navigation bar with tabs: Users, Groups, Branches, and External.
Click on the Branches tab to access the organization's branch management.
Add a New Branch or Site
On the Branches page, click the Add button in the top-right corner.
A sidebar popup will appear with two options: Branch and Site.
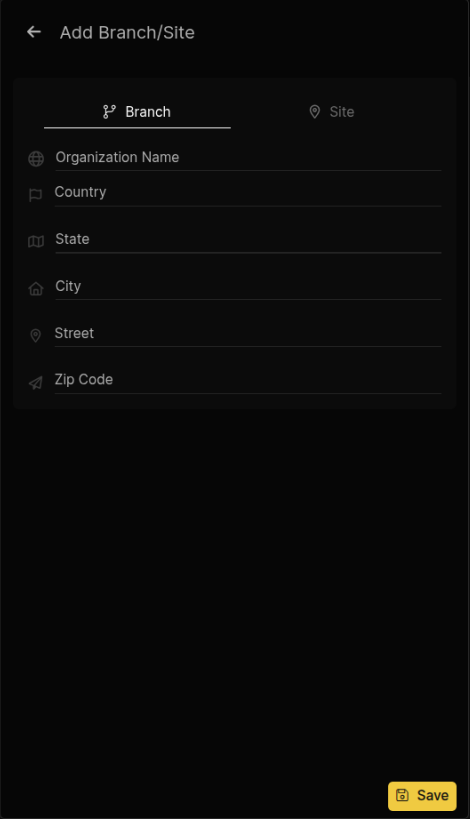
Adding a Branch
Select the Branch option.
Fill in the required details:
Organization Name
Country
State
City
Street
Zip Code
Click Save to create the branch.
Adding a Site
Click the Site tab at the top of the sidebar.
Enter the necessary site information, including:
Name
Country
State
City
Street
Zip Code
Click Save to add the site. Adding a site will create an external location for the organization.
Confirmation
Once the branch or site is successfully added, a confirmation message ("Invite organization successfully") will appear at the top of the screen.
Once the organization accepts the invitation, it will be listed in the Branches List.
Edit Branch
Navigate to the IAM Page
Click on the IAM tab in the top navigation bar.
Locate the Branches section by selecting the Branches tab.
Select the Branch to Edit
Find the branch in the branch list.
Click on the More button next to the branch you want to modify.
Edit Branch Details
A sidebar popup titled Edit Branch will appear.
Choose between the Branch or Site tab at the top.
Modify the necessary fields, such as:
Organization Name
Country
State
City
Street
Zip Code
Save the Changes
After making the required updates, click the Save button in the bottom-right corner.
A confirmation message will appear, indicating that the branch details have been successfully updated.