Event and Lecture Suspension & Reschedule
This guide outlines the procedures for teachers to manage Event and Lecture absences or changes. It provides step-by-step instructions on marking events as Suspended, Rescheduling sessions to new dates, and Uploading Recorded Content to ensure continuity for participants.
Written By Aladia Support
Last updated 3 months ago
Suspending an Event
Use this flow to mark a lesson or event as cancelled due to unforeseen circumstances.
Access the Calendar Page
Navigate to the Calendar tab in the main navigation bar.
Select the Event
Find the specific event within the calendar grid and click on it.
An Event Preview will appear, followed by the Event Editing Pop-Up.
Execute Suspension
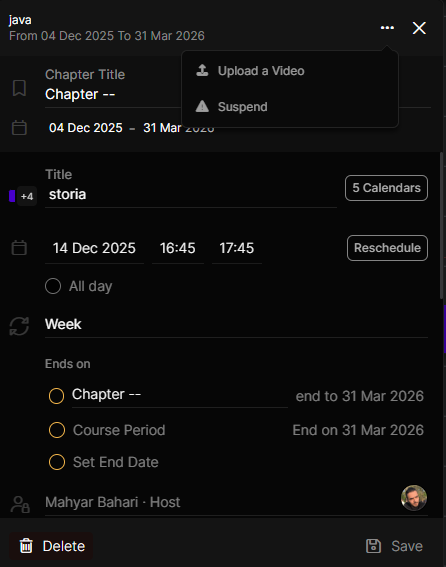
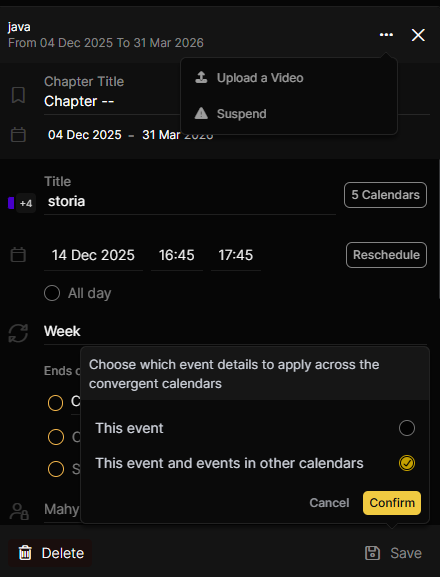
Click the three-dots (⋯) icon at the top right of the Event Editing Pop-Up.
Select Suspend from the menu.
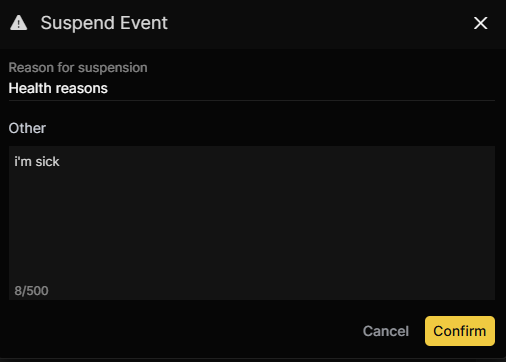
Choose a Reason for Suspension and add any additional context in the details field.
Manage Convergent Events: Choose whether to suspend only that specific event or to apply the suspension to synchronized events in other calendars.
Click Confirm.
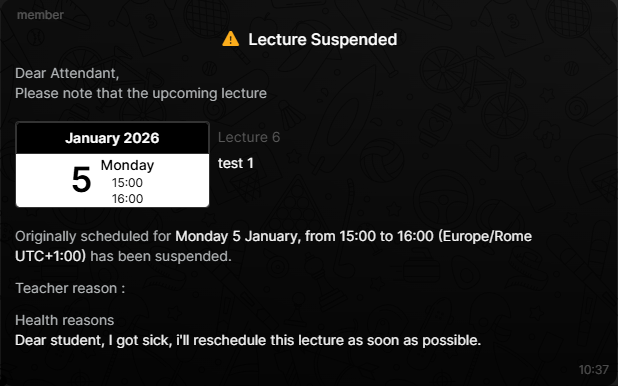
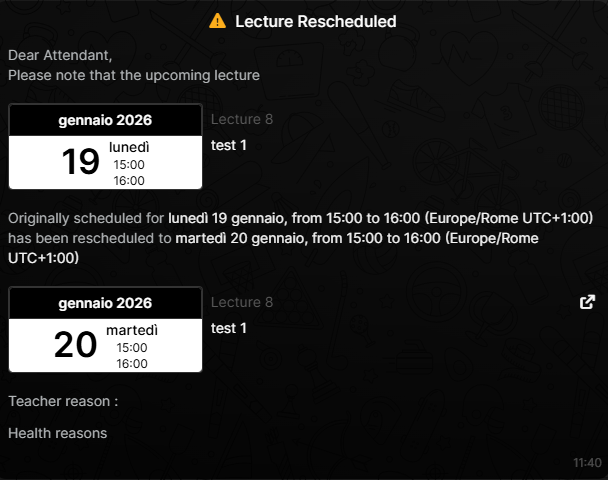
INFO: Once suspended, an automated Email and a Message in the related course chat are sent to participants, including the provided reason. Notification preferences can be managed in Course Settings.
Uploading a Video for the Event
To maintain learning continuity during an absence, teachers can provide a pre-recorded version of the lecture.
Access the Calendar Page
Navigate to the Calendar tab in the navigation bar.
Select the Event
Find the event intended for the recording and click on it to open the Event Editing Pop-Up.
Upload the Content
Click the three-dots (⋯) icon at the top right of the pop-up.
Click on Upload a video.
Select the video file from your local storage.
Scope Selection: Choose to upload the video only to this event or to all convergent events in other calendars.
Click Confirm.
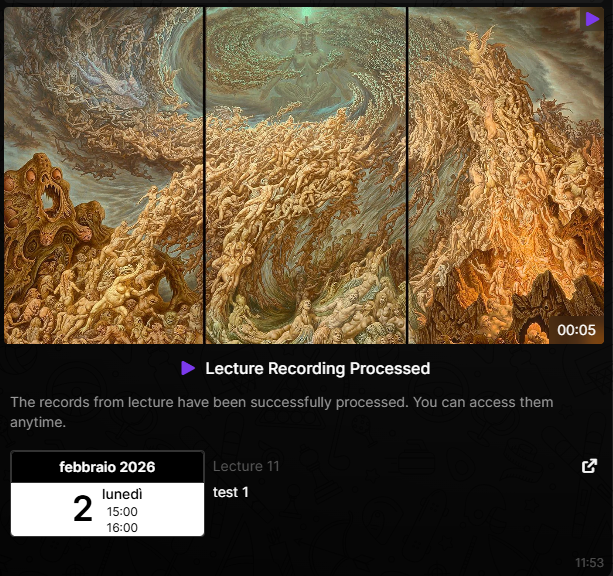
NOTE on Notifications: Participants are notified via Email and Chat Message once the recording is available. This manual upload follows the Recording and AI Summary Generated setting; if that setting is disabled in Course Settings, no notification will be sent.
Rescheduling an Event
Use this flow to move a session to a future date or time.
Access the Calendar Page
Navigate to the Calendar tab.
Select the Event
Click the event you wish to move to open the Event Editing Pop-Up.
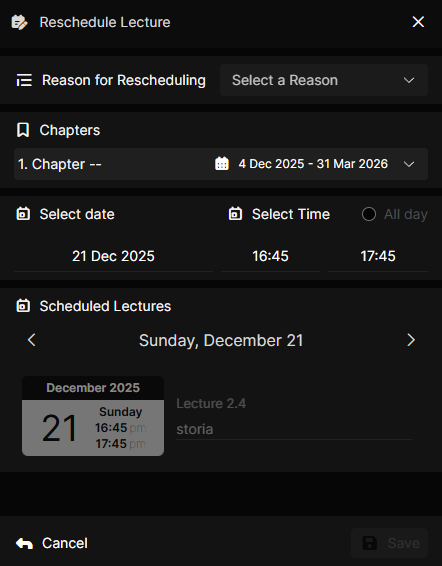
Set New Date and Time
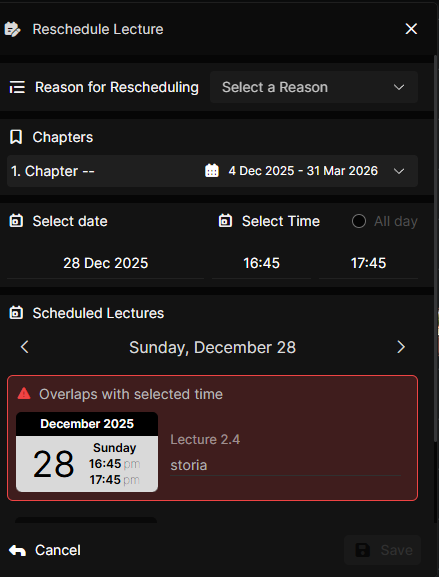
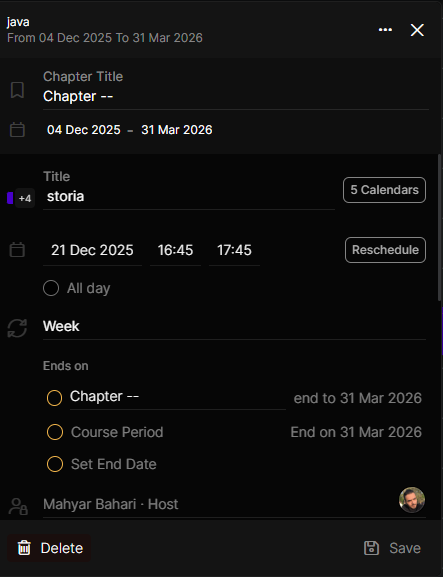
Click the Reschedule button located on the middle right of the pop-up.
Select the Reason for Rescheduling.
Select the new Date and Time for the event.
Click Save.
Confirm the Move
Choose whether to reschedule only the selected event or all related convergent events.
Click Confirm.
WARNING: If the newly selected time overlaps with an existing event on the teacher's schedule, an "Overlaps with selected time" warning will appear. A different available slot must be chosen to proceed.